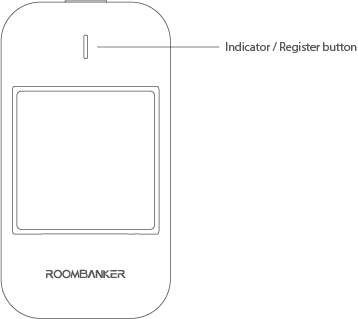
PIR Sensor
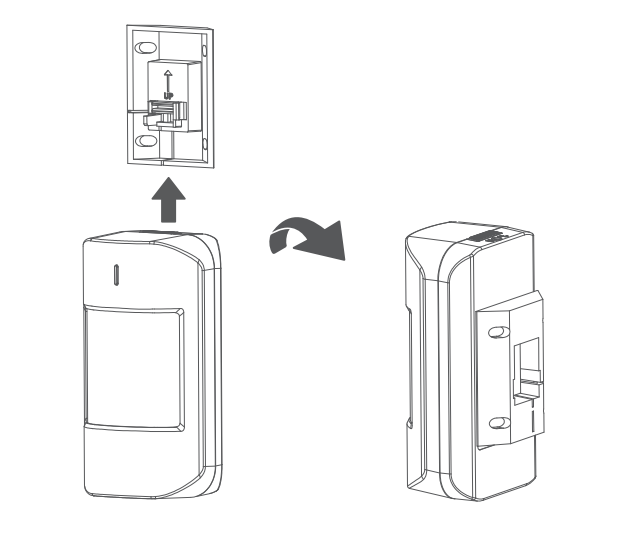
1. Appearance
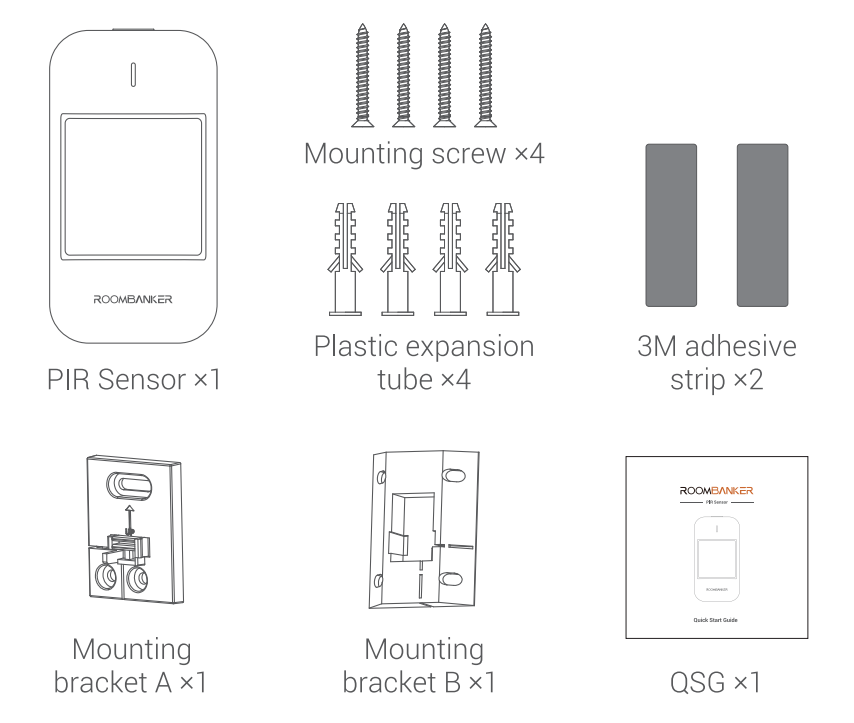
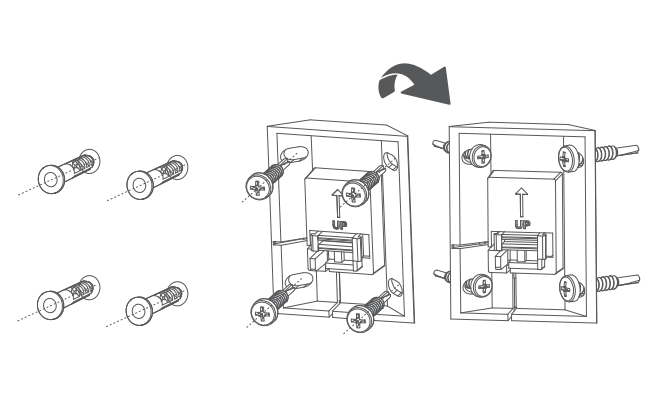
2. Packaging List
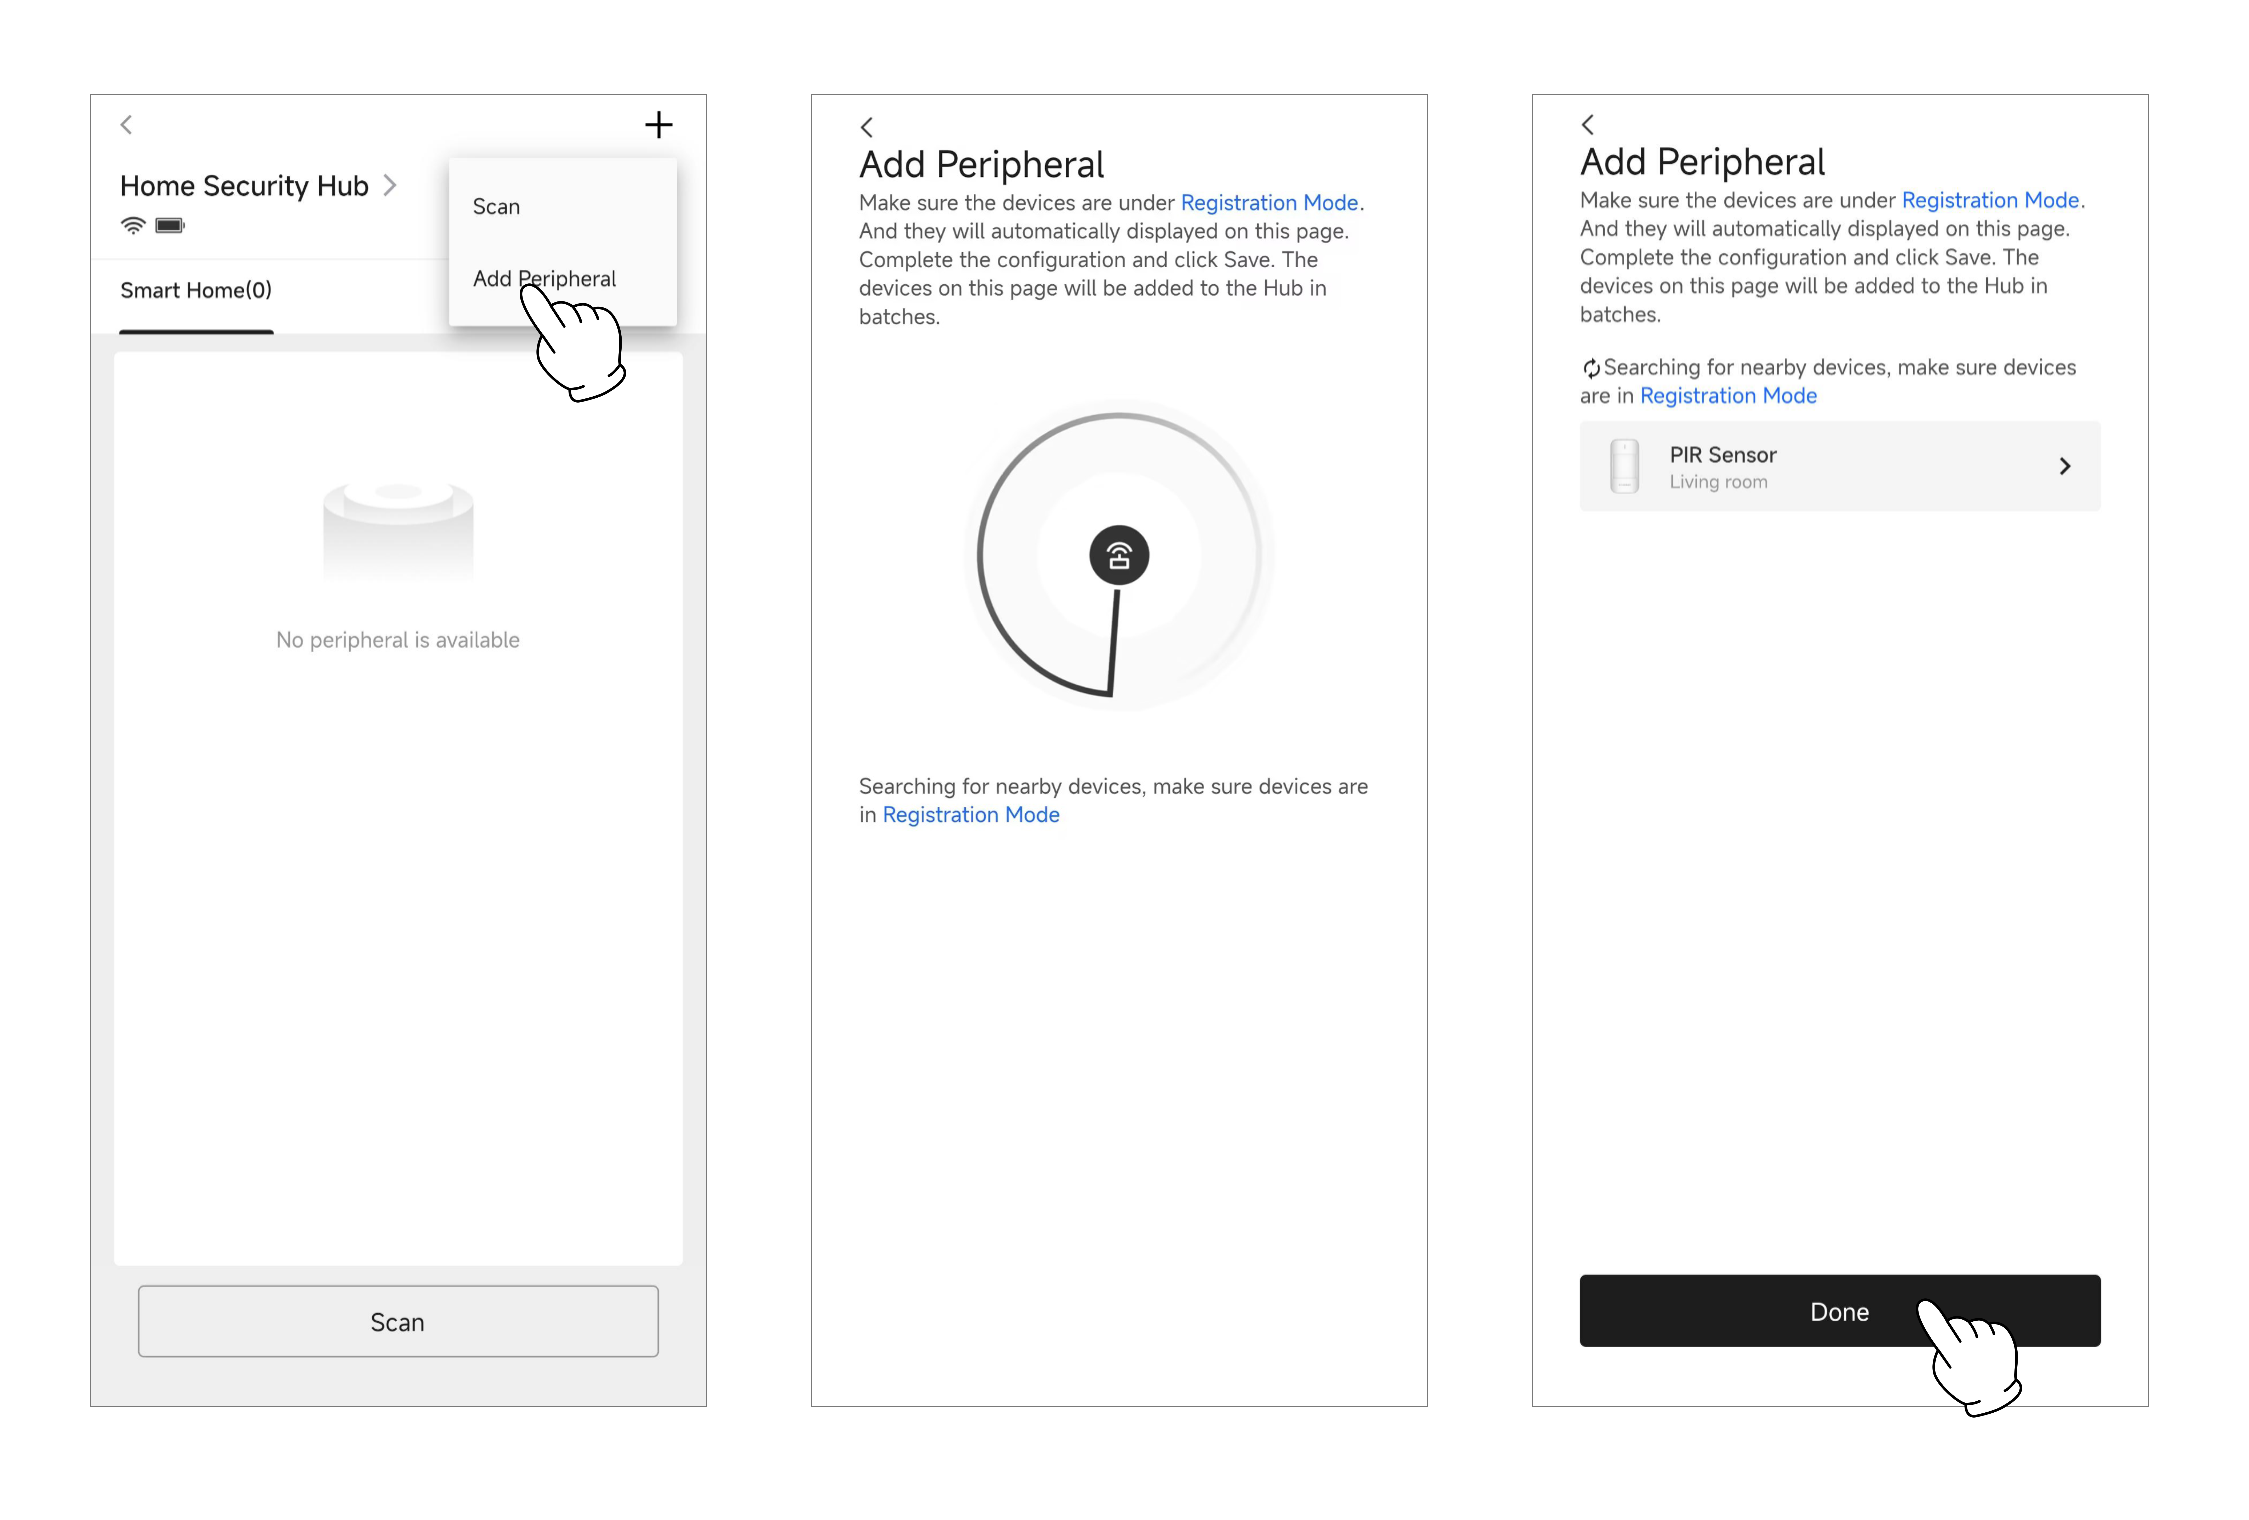
3. Add PIR Sensor
Click Home Security Hub , then click "+" and select "Add peripheral" .
Pull out the insulation strip to power up the device , the green indicator will flash and the device will show in the App.
*Note: If the device does not show in the App and green indicator is off , please press and hold the register button for 5s to try again.
Assign a room and click the "Done" to finish adding.
4. Testing Instruction
Signal Strength Test
Click "  "→ "Signal Strength Test"→ "
  " to check signal strength.

Installation test
Click " "→"Installation test" to start testing.
*Note: You can walk around to trigger the PIR,if indicator flashes RED, that means it is working properly.
5. Installation Instruction
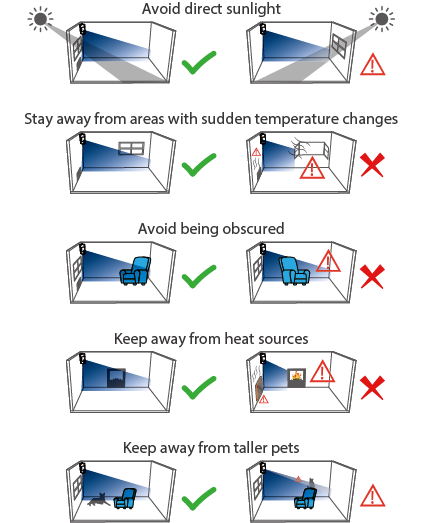
1 Mount on the wall by bracket A
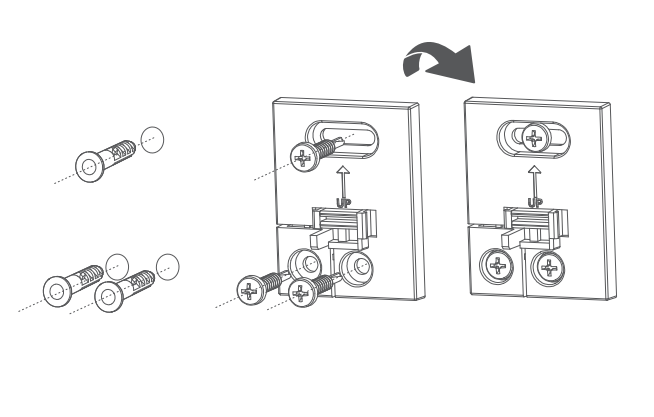
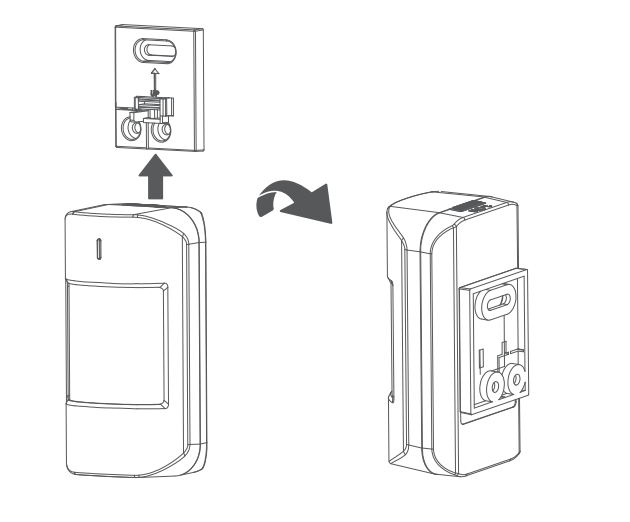
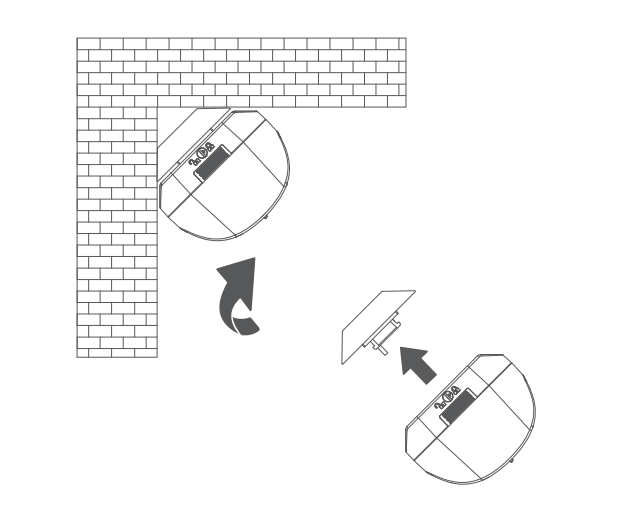
2 Mount on the wall by bracket B
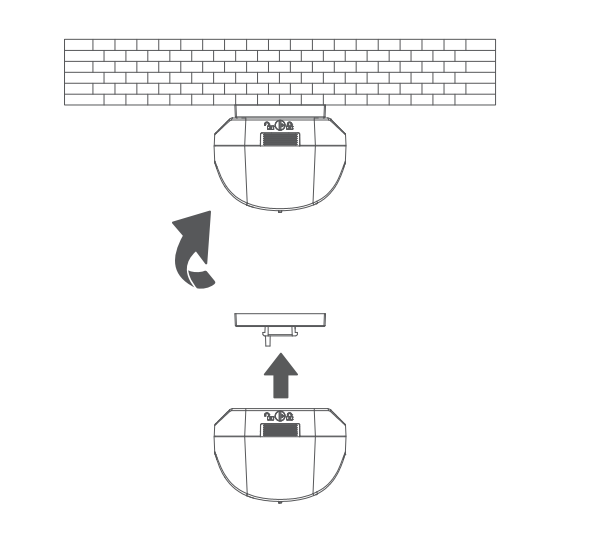
Mount by 3M adhesive strip
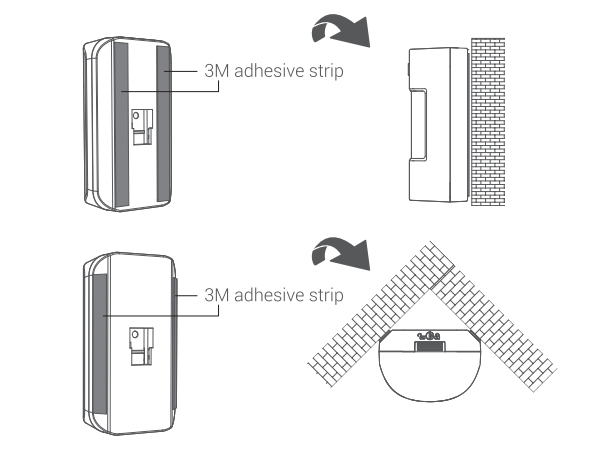
*Note: This installation method does not support tamper detection.
6. Device Specifications
| Parameter | Value |
|---|---|
| Model | RBSS-PS1 |
| Detection Method | Passive Infrared |
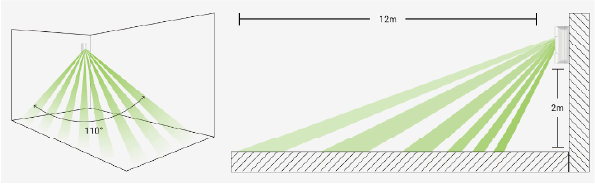
| Detection Performance | 12m, 110° |
| Pet Immunity | 10kg |
| White Light Filter | 2000lux |
| Advanced Features | Digital Processing,Analog Temperature Compensation, Signal Strength Detection,Find me,Dynamic Threshold |
| Tamper Protection | Rear (Triggered when cardan shaft is removed from the PIR sensor.) |
| Transmission Technology | RBF Wireless Transmission |
| Transmission Frequency | 868/915 MHz |
| Transmission Range(Open Space) | 3100 m |
| Advanced Tech | AES-128 Encryption,FHSS,TDMA |
| Power Supply | CR123A × 1,Up to 5 years (standby mode) |
| Dimension (W x H x D) | 114.7 mm x 61.2 mm x 43.8 mm |
| Weight | 102 g |
| Mounting Height | 1.8 m to 2.4 m |
| Application Scenario | Indoor |